Fast jump to:
Introduction
This document explains working examples on how to use Bluemix platform advanced features such as:
- Docker on Bluemix, integrated with Bluemix APIs and middleware
- Full stack automated and unattended deployments with DevOps Services Pipeline, including Docker
- Full stack automated and unattended deployments with
cfcommand line interface, including Docker
For this, I’ll use the following source code structure:
github.com/avibrazil/bluemix-docker-kickstart
The source code currently brings to life (as an example), integrated with some Bluemix services and Docker infrastructure, a PHP application (the WordPress popular blogging platform), but it could be any Python, Java, Ruby etc app.
Before we start: understand Bluemix 3 pillars
I feel it is important to position what Bluemix really is and which of its parts we are going to use. Bluemix is composed of 3 different things:
- Bluemix is a hosting environment to run any type of web app or web service. This is the only function provided by the CloudFoundry Open Source project, which is an advanced PaaS that lets you provision and de-provision runtimes (Java, Python, Node etc), libraries and services to be used by your app. These operations can be triggered through the Bluemix.net portal or by the
cfcommand from your laptop. IBM has extended this part of Bluemix with functions not currently available on CloudFoundry, notably the capability of executing regular VMs and Docker containers. - Bluemix provides pre-installed libraries, APIs and middleware. IBM is constantly adding functions to the Bluemix marketplace, such as cognitive computing APIs in the Watson family, data processing middleware such as Spark and dashDB, or even IoT and Blockchain-related tools. These are high value components that can add a bit of magic to your app. Many of those are Open Source.
- DevOps Services. Accessible from hub.jazz.net, it provides:
- Public and private collaborative Git repositories.
- UI to build, manage and execute the app delivery pipeline, which does everything needed to transform your pure source code into a final running application.
- The Track & Plan module, based on Rational Team Concert, to let your team mates and clients exchange activities and control project execution.
This tutorial will dive into #1 and some parts of #3, while using some services from #2.
The architecture of our app
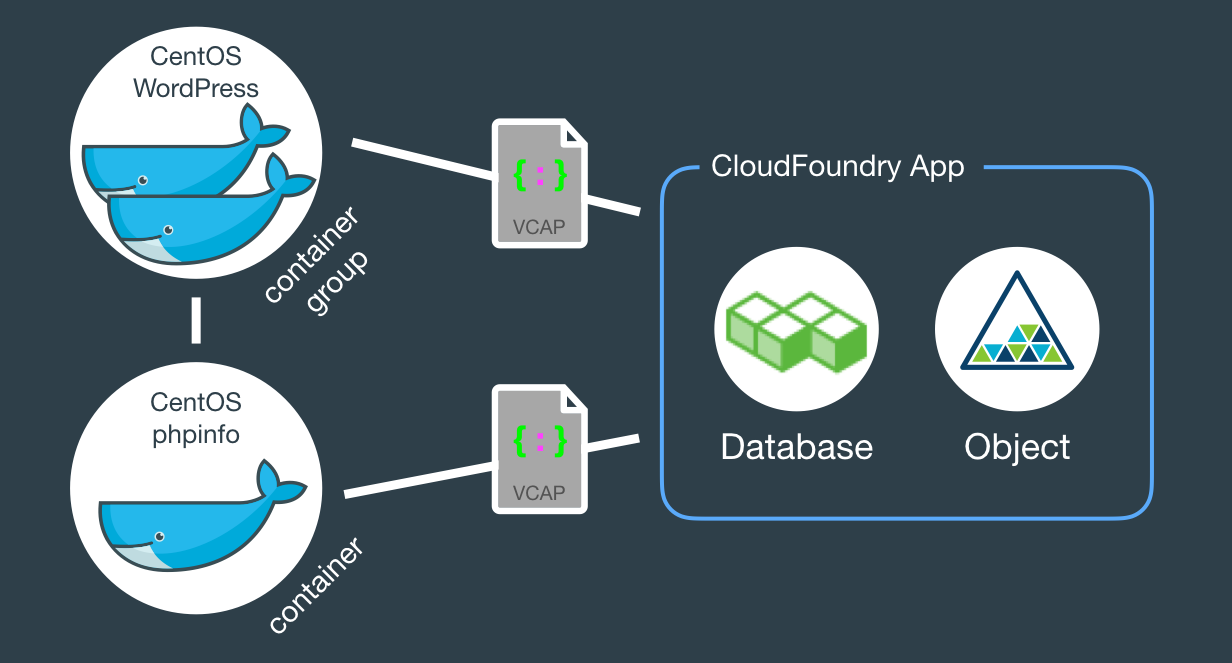
When fully provisioned, the entire architecture will look like this. Several Bluemix services (MySQL, Object store) packaged into a CloudFoundry App (bridge app) that serves some Docker containers that in turns do the real work. Credentials to access those services will be automatically provided to the containers as environment variables (VCAP_SERVICES).
Structure of Source Code
The example source code repo contains boilerplate code that is intentionally generic and clean so you can easily fork, add and modify it to fit your needs. Here is what it contains:
bridge-appfolder andmanifest.ymlfile- The CloudFoundry
manifest.ymlthat defines app name, dependencies and other characteristics to deploy the app contents underbridge-app. containers- Each directory contains a Dockerfile and other files to create Docker containers. In this tutorial we’ll use only the
phpinfoandwordpressdirectories, but there are some other useful examples you can use. .bluemixfolder- When this code repository is imported into Bluemix via the “Deploy to Bluemix” button, metadata in here will be used to set up your development environment under DevOps Services.
adminfolder- Random shell scripts, specially used for deployments.
Watch the deployment
The easiest way to deploy the app is through DevOps Services:
- Click to deploy

- Provide a unique name to your copy of the app, also select the target Bluemix space
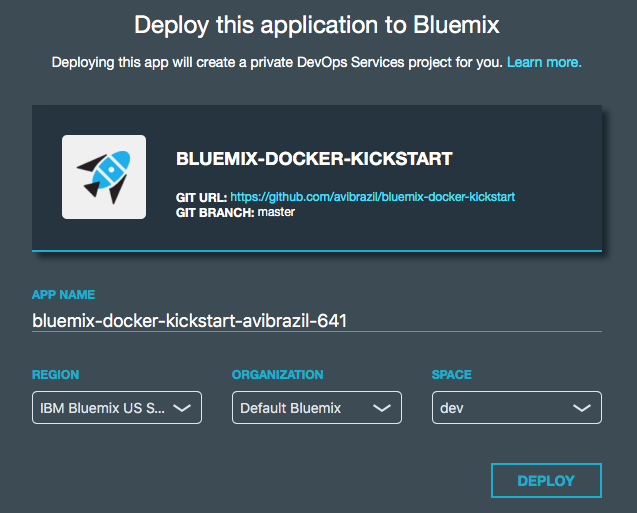
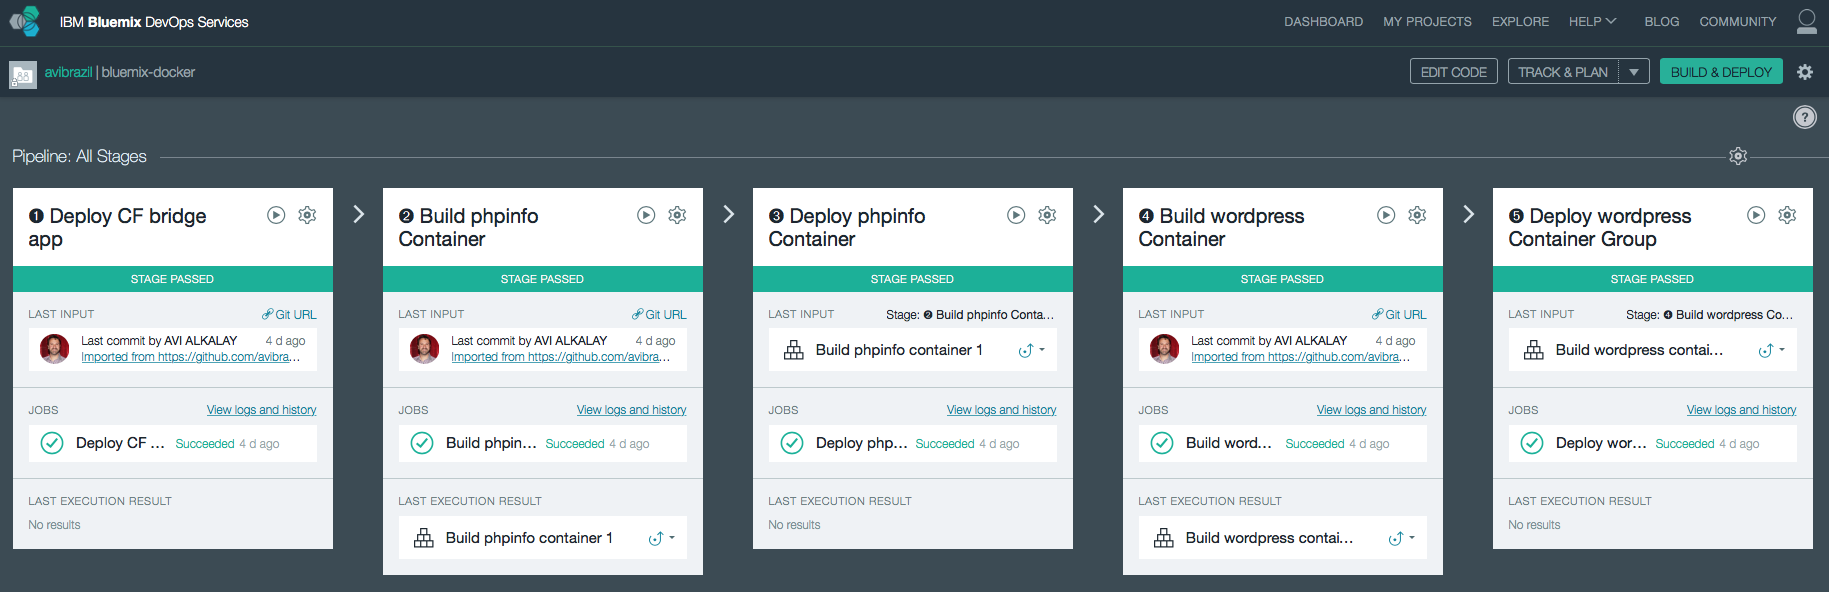
- Go to DevOps Services ➡ find your project clone ➡ select Build & Deploy tab and watch
Under the hood: understand the app deployment in 2 strategies
Conceptually, these are the things you need to do to fully deploy an app with Docker on Bluemix:
- Instantiate external services needed by your app, such as databases, APIs etc.
- Create a CloudFoundry app to bind those services so you can handle them all as one block.
- Create the Docker images your app needs and register them on your Bluemix private Docker Registry (equivalent to the public Docker Hub).
- Instantiate your images in executable Docker containers, connecting them to your backend services through the CloudFoundry app.
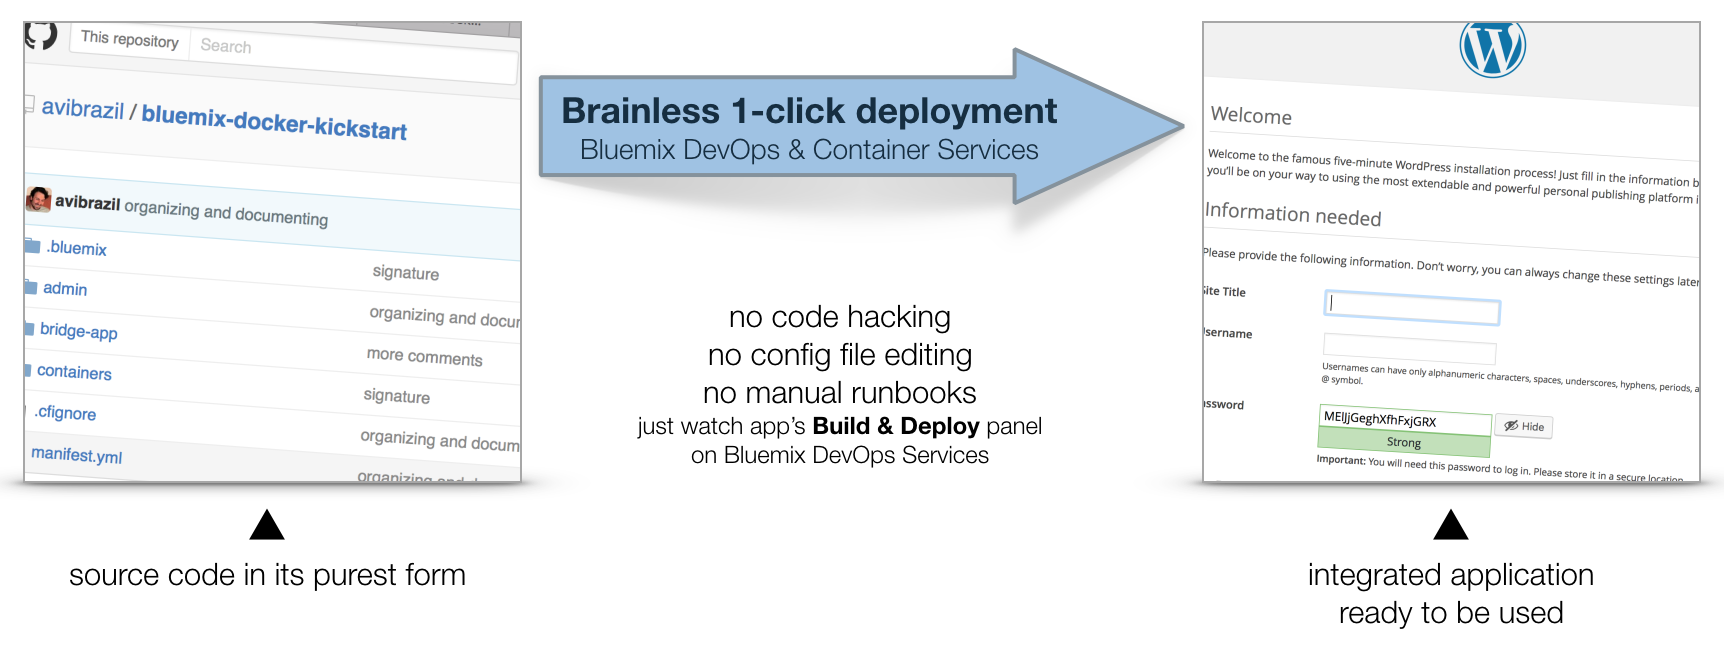
The idea is to encapsulate all these steps in code so deployments can be done entirely unattended. Its what I call brainless 1-click deployment. There are 2 ways to do that:
- A regular shell script that extensively uses the cf command. This is the
admin/deployscript in our code. - An in-code delivery pipeline that can be executed by Bluemix DevOps Services. This is the
.bluemix/pipeline.ymlfile.
From here, we will detail each of these steps both as commands (on the script) and as stages of the pipeline.
-
Instantiation of external services needed by the app…
I used the
cf marketplacecommand to find the service names and plans available. ClearDB provides MySQL as a service. And just as an example, I’ll provision an additional Object Storage service. Note the similarities between both methods.Deployment Scriptcf create-service \ cleardb \ spark \ bridge-app-database; cf create-service \ Object-Storage \ Free \ bridge-app-object-store;
Delivery PipelineWhen you deploy your app to Bluemix, DevOps Services will read your
manifest.ymland automatically provision whatever is under the declared-services block. In our case:declared-services: bridge-app-database: label: cleardb plan: spark bridge-app-object-store: label: Object-Storage plan: Free -
Creation of an empty CloudFoundry app to hold together these services
The
manifest.ymlfile has all the details about our CF app. Name, size, CF build pack to use, dependencies (as the ones instantiated in previous stage). So a plaincf pushwill use it and do the job. Since this app is just a bridge between our containers and the services, we’ll use minimum resources and the minimumnoop-buildpack. After this stage you’ll be able to see the app running on your Bluemix console. -
Creation of Docker images
The heavy lifting here is done by the
Dockerfiles. We’ll use base CentOS images with official packages only in an attempt to use best practices. See phpinfo and wordpress Dockerfiles to understand how I improved a basic OS to become what I need.The
cf iccommand is basically a clone of the well knowndockercommand, but pre-configured to use Bluemix Docker infrastructure. There is simple documentation to install the IBM Containers plugin tocf.Deployment Scriptcf ic build \ -t phpinfo_image \ containers/phpinfo/; cf ic build \ -t wordpress_image \ containers/wordpress/;
Delivery PipelineStages handling this are “➋ Build phpinfo Container” and “➍ Build wordpress Container”.
Open these stages and note how image names are set.
After this stage, you can query your Bluemix private Docker Registry and see the images there. Like this:
$ cf ic images
REPOSITORY                                          TAG     IMAGE ID      CREATED     SIZE
registry.ng.bluemix.net/avibrazil/phpinfo_image     latest  69d78b3ce0df  3 days ago  104.2 MB
registry.ng.bluemix.net/avibrazil/wordpress_image   latest  a801735fae08  3 days ago  117.2 MB
A Docker image is not yet a container. A Docker container is an image that is being executed.
-
Run containers integrated with previously created bridge app
To make our tutorial richer, we’ll run 2 sets of containers:
- The phpinfo one, just to see how Bluemix gives us an integrated environment
Deployment Script
cf ic run \
   -P \
   --env 'CCS_BIND_APP=bridge-app-name' \
   --name phpinfo_instance \
   registry.ng.bluemix.net/avibrazil/phpinfo_image;


IP=`cf ic ip request |
    grep "IP address" |
    sed -e "s/.* \"\(.*\)\" .*/\1/"`;


cf ic ip bind $IP phpinfo_instance;
Delivery PipelineEquivalent stage is “➌ Deploy phpinfo Container”.
Open this stage and note how some environment variables are defined, specially the
BIND_TO.Bluemix DevOps Services default scripts use these environment variables to correctly deploy the containers.
The
CCS_BIND_APPon the script andBIND_TOon the pipeline are key here. Their mission is to make the bridge-app’sVCAP_SERVICESavailable to this container as environment variables.In CloudFoundry,
VCAP_SERVICESis an environment variable containing a JSON document with all credentials needed to actually access the app’s provisioned APIs, middleware and services, such as host names, users and passwords. See an example below. - A container group with 2 highly available, monitored and balanced identical wordpress containers
Deployment Script
cf ic group create \
   -P \
   --env 'CCS_BIND_APP=bridge-app-name' \
   --auto \
   --desired 2 \
   --name wordpress_group_instance \
   registry.ng.bluemix.net/avibrazil/wordpress_image


cf ic route map \
   --hostname some-name-wordpress \
   --domain $DOMAIN \
   wordpress_group_instance
The
cf ic group createcreates a container group and runs them at once.The
cf ic route mapcommand configures Bluemix load balancer to capture traffic to http://some-name-wordpress.mybluemix.net and route it to thewordpress_group_instancecontainer group.Delivery PipelineEquivalent stage is “➎ Deploy wordpress Container Group”.
Look in this stage’s Environment Properties how I’m configuring container group.
I had to manually modify the standard deployment script, disabling deploycontainer and enabling deploygroup.
- The phpinfo one, just to see how Bluemix gives us an integrated environment
See the results
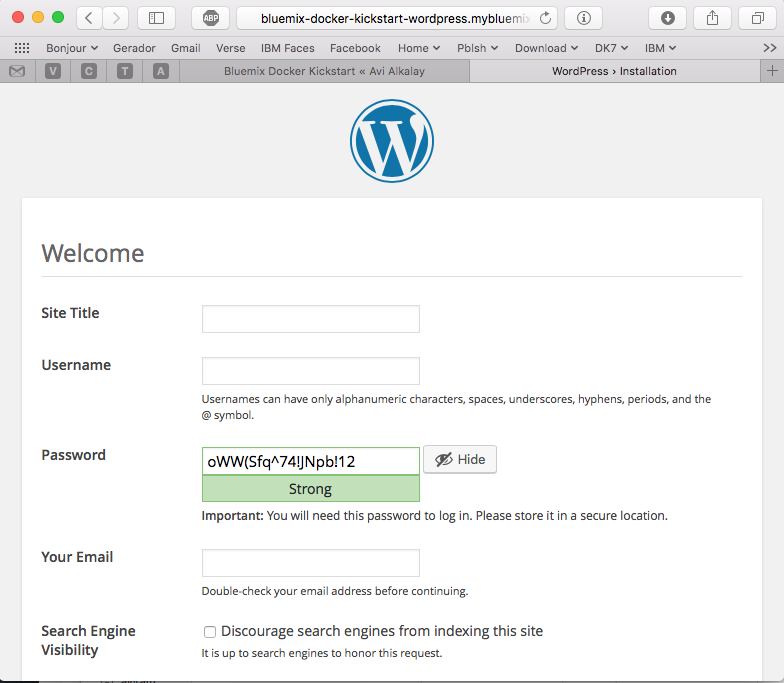
At this point, WordPress (the app that we deployed) is up and running inside a Docker container, and already using the ClearDB MySQL database provided by Bluemix. Access the URL of your wordpress container group and you will see this:
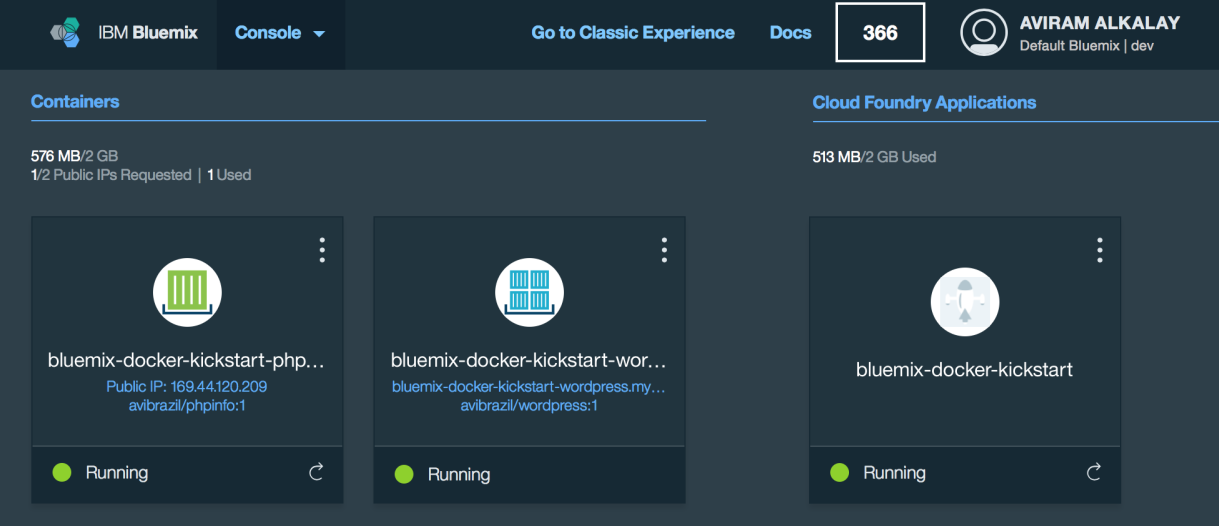
Bluemix dashboard also shows the components running:
But the most interesting evidence you can see accessing the phpinfo container URL or IP. Scroll to the environment variables section to see all services credentials available as environment variables from VCAP_SERVICES:
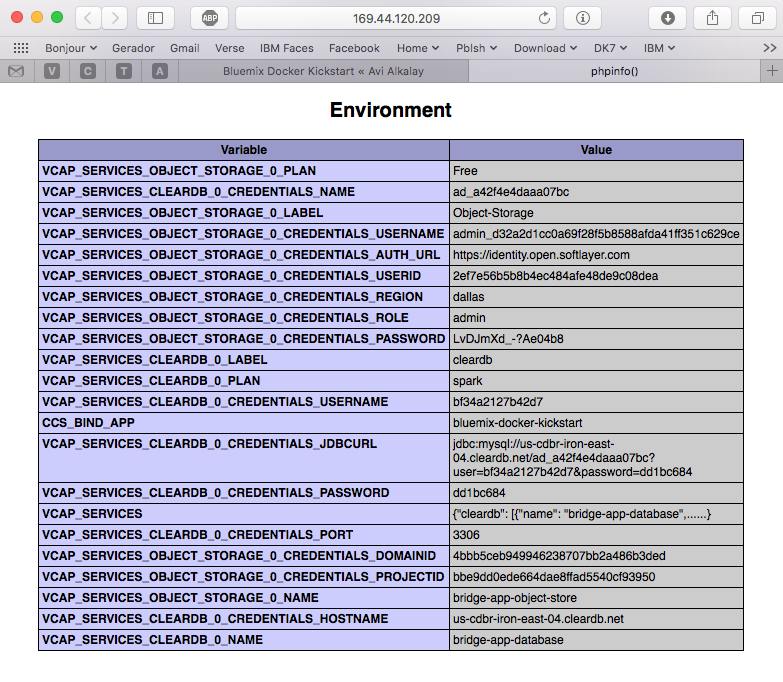
I use these credentials to configure WordPress while building the Dockerfile, so it can find its database when executing:
.
.
.
RUN yum -y install epel-release;\
	yum -y install wordpress patch;\
	yum clean all;\
	sed -i '\
		         s/.localhost./getenv("VCAP_SERVICES_CLEARDB_0_CREDENTIALS_HOSTNAME")/ ; \
		s/.database_name_here./getenv("VCAP_SERVICES_CLEARDB_0_CREDENTIALS_NAME")/     ; \
		     s/.username_here./getenv("VCAP_SERVICES_CLEARDB_0_CREDENTIALS_USERNAME")/ ; \
		     s/.password_here./getenv("VCAP_SERVICES_CLEARDB_0_CREDENTIALS_PASSWORD")/ ; \
	' /etc/wordpress/wp-config.php;\
	cd /etc/httpd/conf.d; patch < /tmp/wordpress.conf.patch;\
	rm /tmp/wordpress.conf.patch
.
.
.
So I’m using sed, the text-editor-as-a-command, to edit WordPress configuration file (/etc/wordpress/wp-config.php) and change some patterns there into appropriate getenv() calls to grab credentials provided by VCAP_SERVICES.
Dockerfile best practices
The containers folder in the source code presents one folder per image, each is an example of different Dockerfiles. We use only the wordpress and phpinfo ones here. But I’d like to highlight some best practices.
A Dockerfile is a script that defines how a container image should be built. A container image is very similar to a VM image, the difference is more related to the file formats that they are stored. VMs uses QCOW, VMDK etc while Docker uses layered filesystem images. From the application installation perspective, all the rest is almost the same. But only only Docker and its Dockerfile provides a super easy way to describe how to prepare an image focusing mostly only on your application. The only way to automate this process on the old Virtual Machine universe is through techniques such as Red Hat’s kickstart. This automated OS installation aspect of Dockerfiles might seem obscure or unimportant but is actually the core of what makes viable a modern DevOps culture.
- Being a build script, it starts from a base parent image, defined by the FROM command. We used a plain official CentOS image as a starting point. You must select very carefully your parent images, in the same way you select the Linux distribution for your company. You should consider who maintains the base image, it should be well maintained.
- Avoid creating images manually, as running a base container, issuing commands manually and then committing it. All logic to prepare the image should be scripted in your Dockerfile.
- In case complex file editing is required, capture edits in patches and use the
patchcommand in your Dockerfile, as I did on wordpress Dockerfile.
To create a patch:diff -Naur configfile.txt.org configfile.txt > configfile.patch
Then see the wordpress Dockerfile to understand how to apply it.
- Always that possible, use official distribution packages instead of downloading libraries (
.zipor.tar.gz) from the Internet. In the wordpress Dockerfile I enabled the official EPEL repository so I can install WordPress with YUM. Same happens on the Django and NGINX Dockerfiles. Also note how I don’t have to worry about installing PHP and MySQL client libraries – they get installed automatically when YUM installs wordpress package, because PHP and MySQL are dependencies.
When Docker on Bluemix is useful
CloudFoundry (the execution environment behind Bluemix) has its own Open Source container technology called Warden. And CloudFoundry’s Dockerfile-equivalent is called Buildpack. Just to illustrate, here is a WordPress buildpack for CloudFoundry and Bluemix.
To chose to go with Docker in some parts of your application means to give up some native integrations and facilities naturally and automatically provided by Bluemix. With Docker you’ll have to control and manage some more things for yourself. So go with Docker, instead of a buildpack, if:
- If you need portability, you need to move your runtimes in and out Bluemix/CloudFoundry.
- If a buildpack you need is less well maintained then the equivalent Linux distribution package. Or you need a reliable and supported source of pre-packaged software in a way just a major Linux distribution can provide.
- If you are not ready to learn how to use and configure a complex buildpack, like the Python one, when you are already proficient on your favorite distribution’s Python packaging.
- If you need Apache HTTPD advanced features as mod_rewrite, mod_autoindex or mod_dav.
- If you simply need more control over your runtimes.
The best balance is to use Bluemix services/APIs/middleware and native buildpacks/runtimes whenever possible, and go with Docker on specific situations. Leveraging the integration that Docker on Bluemix provides.
Very detailed and easy to understand description about how thinks work. Thx Avi!
Sensacional Avi, muito claro e didático. Parabéns pelo trabalho.