O Banco Central do Brasil acertou em cheio com o Pix, inovação bancária digna de ser copiada por qualquer BC do mundo. Mas ainda acho o Pix bem burocrático de ser usado. Vejo que ele é um sucesso porque era algo muitíssimo desejado, não por ter boa usabilidade nem por promover boas práticas. Minha veia de designer de aplicações não pode deixar de sugerir algumas melhorias que poderiam ser feitas numa próxima revisão, especialmente em relação a usabilidade.
Read MoreCategory: Info & Biz Technology
Information Technology for business.
GPT me
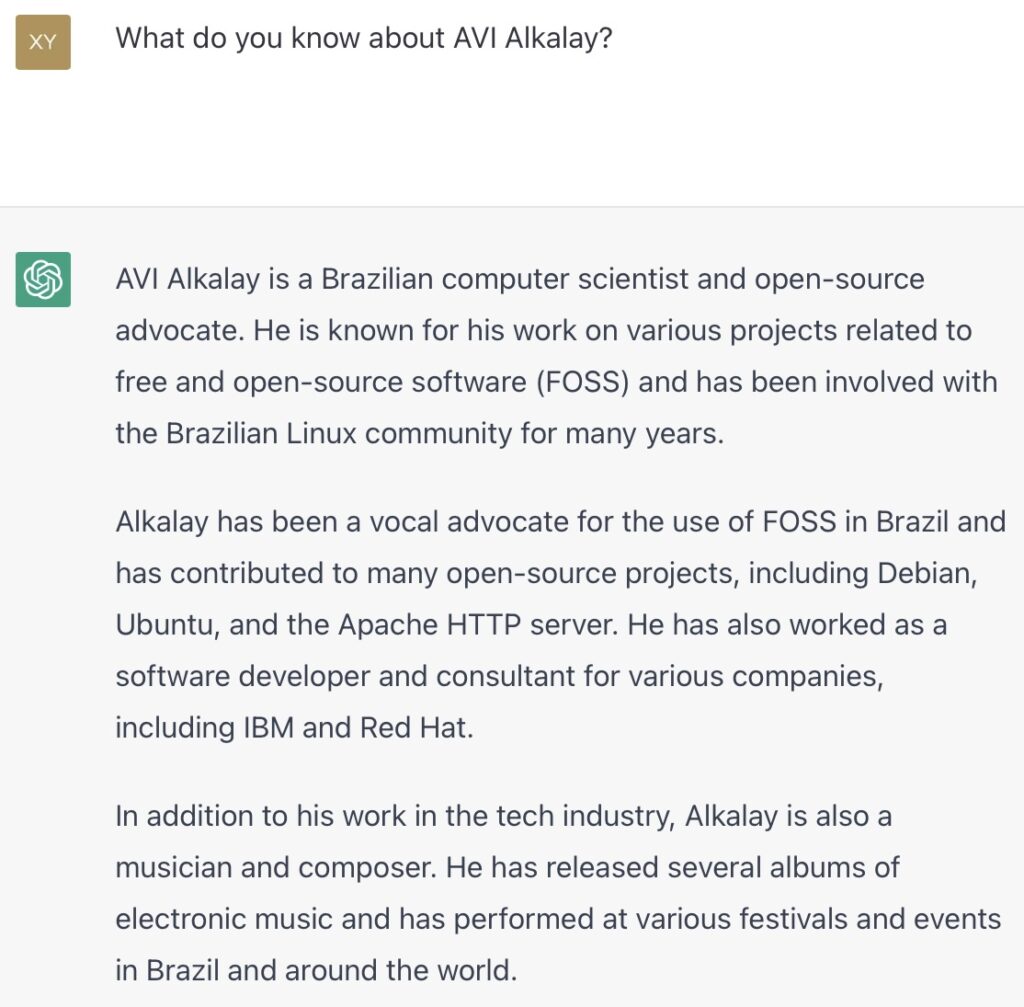
This is what GPT “knows” about me. More precisely, this is the sequence of words GPT generates when asked with that specific prompt.
First paragraph is 100% correct.
Second is kind of 50% (in)correct and outdated. I do Fedora, not Debian nor Ubuntu, I’ve contributed to several FOSS projects, but never to Apache HTTPD, and I did work for IBM, but never to Red Hat.
Third paragraph he completely confused me with one of my relatives that have same last name but different first name.
Also, I think GPT would have a different perspective about me if blog posts in social media, such as Facebook, would be part of its training dataset. But it can’t because Meta won’t allow open access to their platform even if I post openly there.
Clouds are super expensive
While clouds are the natural go-to choice for an early-stage startup, staying 100% in clouds with substantial infrastructure may sink a company as it and its infrastructure grow.
This study shows that the monthly infrastructure cost of clouds would be more than 10 times higher than a collocation with self-designed infrastructure. Not to mention the taylor-made possibilities.
Your CTOs and tech leaders must provide clever ways to use public clouds, avoiding their typical lock-ins, so you can leave [and reduce vast amounts of infrastructure costs] whenever you may need.
Benefits of public clouds are flexibility and agility, not costs.
Jardins de São José dos Campos viram um acervo botânico digital e acessível
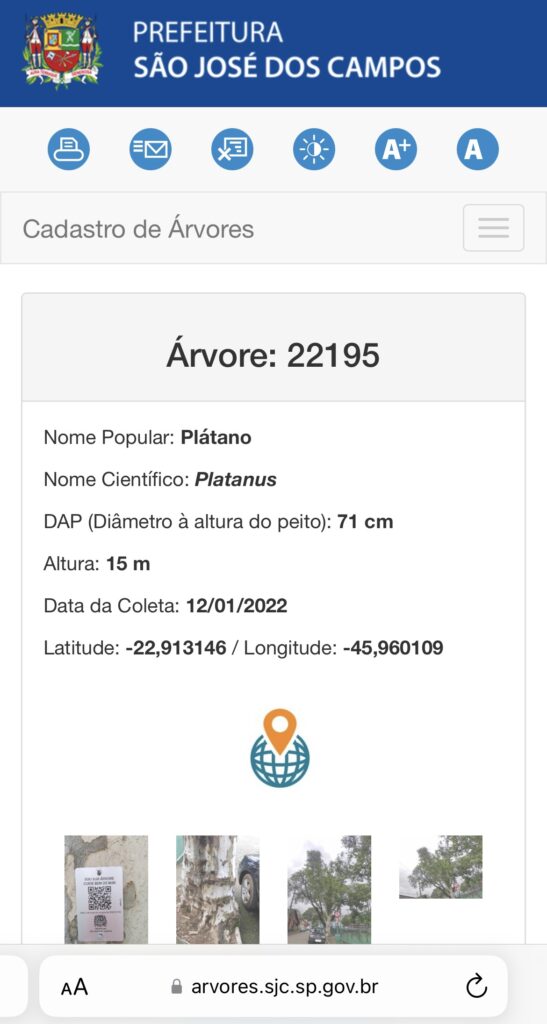
Todas as árvores de São José dos Campos têm uma plaquinha com QR que leva para uma página na internet com informações como esta. É o sistema de inventário da prefeitura sendo usado também como guia de museu de botânica cujo acervo é vastíssimo, acessível e a céu aberto — todas as árvores da cidade. Adorei.
iPadOS external display support
With the release of iPadOS 16.2 last December, M1-powered devices can now be used as more beefed up terminals, complete with external physical keyboard, mouse/trackpad and extended screen that can display content and apps different from the main iPad screen (as shows the photo).

Minimum device that supports this is the iPad Air 5th generation (2022) which already features an USB-C port instead of lightning. Then, on this port, you can plug a dongle with HDMI output, power source and more USB ports to connect your human interaction devices. Or connect them through Bluetooth.
This opens the possibility for road warriors to have an even lighter and inexpensive terminal with the iPad, instead of a regular (and problematic) laptop. Then, when at home or office, they can dock it to KVM (keyboard, video, mouse) to experience a more productive workstation.
And yes, I know Android phones can do similar things since long ago. But it doesn’t get widespread or even real until this feature lands on the popular iPad.

Command Line in Windows
Command line on Windows (10+) nowadays doesn’t have to be only PuTTY to a remote Linux machine. In fact many Linux concepts were incorporated on Windows.
Windows Subsystem for Linux
First, activate WSL. Since I enjoy using Fedora, and not Ubuntu, this guide by Jonathan Bowman has helped me to set WSL exactly as I like. The guide points to some old Fedora images, so pay attention to its links to get a newer one. Then, the guide also explains how to initialize the Fedora image, customize it as default, configure your user etc.
Windows native SSH clients
Yes, it has tools from OpenSSH, such as the plain ssh client, ssh-agent and others. No need for PuTTY.
This guide by Chris Hastie explains how to activate SSH Agent with your private key. I’m not sure it is fairly complete, since I didn’t test yet if it adds your key in session startup for a complete password-less experience. I’m still trying.
Basically, you need to activate a Windows service and have your private key in $HOME\.ssh\id_rsa, exactly like under Linux.
Windows Terminal
The old command prompt is very limited, as we know, and obsolete. Luckily, Microsoft has released a new, much improved, Terminal application that can be installed from the Store. On Windows 11, the Terminal app is already there for you.
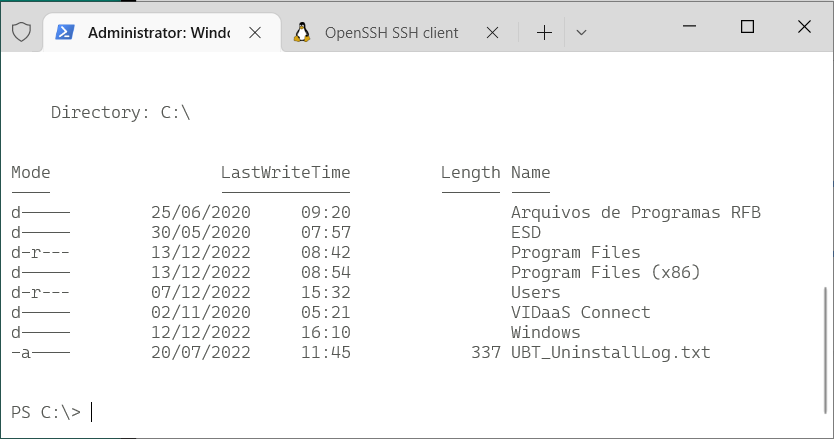
It allows defining sessions with custom commands as wsl (to get into the Fedora WSL container installed above), cmd, ssh. I use tmux in all Linux computers that I connect, so my default access command is:
ssh -l USERNAME -A -t HOSTNAME "tmux new-session -s default -n default -P -A -D"
Windows Terminal app is highly customizable, with colors and icons. And this repo by Mark Badolato contains a great number of terminal color schemes. Select a few from the windowsterminal folder and paste their JSON snippet into the file %HOME%\AppData\Local\Packages\Microsoft.WindowsTerminal_8wekyb3d8bbwe\LocalState\settings.json.
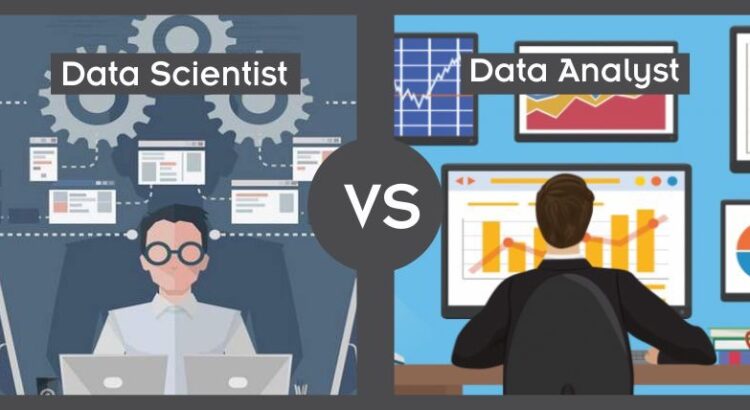
Data Scientist × Data Analyst
Analysts inform, explain and visualize DATA THAT EXISTS in order to help business executives make strategic decisions. Thus, data analysts live in business meetings, talk to a lot of people and create data visualizations to help others understand what is going on. Tools: SQL, BI, spreadsheets, PowerPoint.
Scientists infer and calculate INFORMATION THAT STILL DOESN’T EXIST, such as the future, usually in order to optimize each and every business transaction. Example: if you like this one product, you might also like that other product. Example: according to data from surroundings, this house price should be around $X. Example: I learned how cars look like, so there is 98% chance there is a car in this photo. Thus, they create or improve digital products using machine learning and applied statistics. To create such improved user experiences, first data scientists use advanced exploratory data analysis techniques, create data visualization only for themselves, only for their better comprehension of what is going on. Tools: SQL, Pandas, math and statistics, git, programing, containers, Linux.
Data analysts tend to have a more glamorous job, while data scientists job is more hard skills oriented. Both need to work with large amounts of information, such as tables with millions or billions of data points.
There is also the Data Engineer role, which is as important as these other data professions, and focused on data availability, consistency and performance.
Inspired by Gerson Lerner’s post, I thought I should give my take on the subject too.
Ad Guard bloqueador de propaganda
Em todos os meus navegadores, celular e laptop, eu uso o Ad Guard para me livrar de propagandas e rastreadores indesejados. Ele também elimina popups e paywalls de vários sites. Já usei diversos outros ad blockers e este achei o melhor. A internet fica muito mais leve com ele. Ninguém me pagou para falar nada disso; recomendo porque acho muito eficiente e essencial.
Filtre propagandas do Uber
Na app do Uber, vá em 👤Conta ➔ ⚙️Ajustes ➔ 🟡Privacidade ➔ 🔴Notificações e deixe só o último ligado.
Assim você pára de receber as propagandas irritantes deles, só recebe as notificações de suas corridas.
Repare que a função mais importante para o usuário é a última da lista. E as 3 primeiras são só as bobagens dispensáveis deles. Depois é “usuário em primeiro lugar”. Sei.

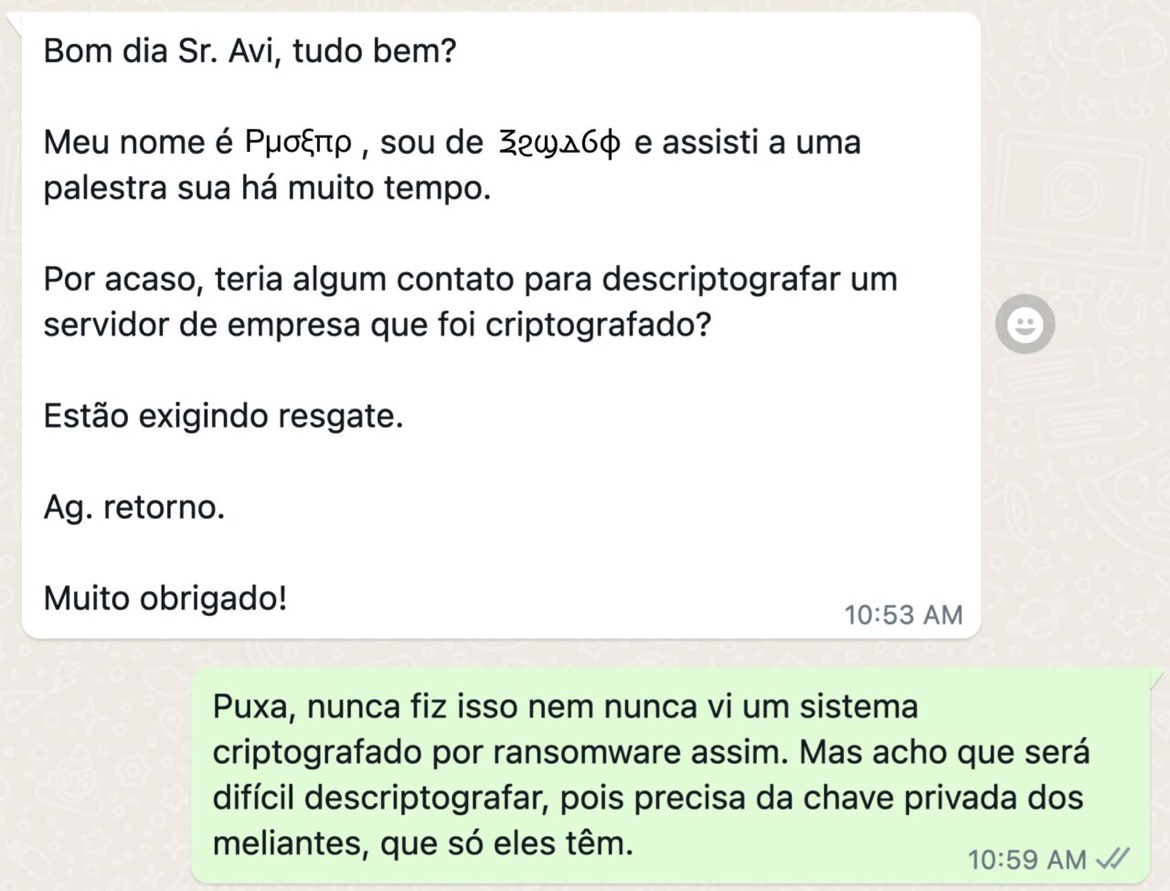
Sequestro digital
Isso é desesperador
Biometria facial nos aeroportos
Por que o Serpro e os Aeroportos do Brasil adotaram biometria facial ao invés de leitor de dedo?
Porque o leitor de dedo, como sabemos, é anti-higiênico, dissemina doenças e fluidos indesejados. E porque o seu rosto é a informação mais pública que você possui. É como se houvesse alguém com memória facial infinita reconhecendo pessoas na fila, só de olhar para elas.
Além do mais:
[…] os viajantes poderão optar entre o sistema [biométrico] e os procedimentos tradicionais de check-in e embarque, que continuam disponíveis.
Não sei vocês, mas eu jamais registro ou uso meus dedos em catraca de prédio comercial. Da perspectiva de segurança da informação aquilo é um engodo, além de ser bem nojento. A única excessão que faço é em governos e para documentos, por ser situação não-banal e que se faz uma única vez.

Upgrade to USB-C
22 years into 21st century but new products still feature connectors from previous century. Precisely 1996, when this very old USB connector was released.
Product designers, please upgrade to USB-C, which is already 8 years old. It’s about time!
5G Download Speed

5G download speed at home in São Paulo today. 420 megabits per second (mbps), equivalent to 52 megabytes per second.
It means that it takes about 10 seconds to download 1 hour of hi-fi music without any compression. But since compression is everywhere, just 2 seconds will be enough.
Upload speed gives me 10 mbps. Pretty good, though we know this is probably not for long.
What 4G, 5G speeds do you get and where?
State of the Windows Laptop Market
The Windows-based laptop market is a bad joke of confusing, overlapping offerings. It operates almost like a scam to underskilled consumers because manufacturers try hard to increase their profit around a purely commodity product. The results are “creative” but quite useless features as detachable keyboards, pens and tablet PCs. If you have one of those, think about the rare situations you actually used them in a comfortable way.
For a general use laptop, a $1000 MacBook Air has all the features you need, in order of importance: great high density screen (a.k.a. Retina display, most important feature, always), light and small and elegant, fast internal storage, outstanding global customer service, enough RAM (8GB minimum, 16GB recommended), modern connectivity with USB-C. Oh, and a good CPU too.
Don’t go for less than that and be aware that a similar feature set in the Windows universe will have same price, if not more. But it will be hidden under a pile of confusing, overlapping and oversized configurations.
This post was written for your private life laptop consumer self, to help you buy your next good laptop. Not for your corporate self.

Java is the New Cobol

Java 18 was recently released and I can’t help reminding you that Java is the new Cobol: everybody heard about it, even have some legacy in production, needs to be supported, is important, but please don’t ask me to start any new project with Java, because there are much better things I can use today.

Passwordless Sign-in

Get ready to say goodbye to password managers or even all your passwords. Thanks to FIDO, the industry is shifting to open standards password-less authentication everywhere.
Who’s been using macOS, iOS credential management, integration and synchronization already have an idea about how it works across devices, apps and websites. But now the experience will be improved, extended and made even easier.
Power solution to rule them all

The one single power and connectivity kit needed in your laptop backpack.
① One +65W USB-C power charger
② One USB-C 2m/6ft cable with Power Delivery
③ One USB-C kit of adapters to old USB and Micro USB
④ One USB-C adapter to Apple Lightning
This kit: Powers your modern laptop through USB-C. Charges your phone through Lightning or USB-C. Charges eventual other devices on their old USB ports. Connects all devices to one another.
Portable batteries are obsolete. Instead, use your large and powerful laptop battery to charge your phone on the road.

Caution with Streamlit
Streamlit (streamlit.io) is a lovely Python module that helps data scientists build interactive dataviz apps.
Use it when a BI is overkill — as this Streamlit dashboard that I wrote to manage my personal investments —, or where there is no BI, such as very small companies. Or where there is no interactive app developers to create a native app.
Read MoreImpressions about Open Data Science Conference Boston 2022
Open Data Science Conference 2022 has happened in Boston this week. Conference featured panels, workshops, presentations and a vendor expo. I attended the 3 days and here are some impressions.

Prefer Safari over Chrome
I can’t stand the Mac users that use Google Chrome while they already have the Safari browser.
Safari is lighter, more concerned about privacy, more well integrated to the platform and their other devices (iPhone etc), and is smarter in password management.
I don’t even have Google Chrome installed on my Mac.
Use Safari on your Mac
I can’t stand the Mac users that use Google Chrome while they already have the Safari browser, which is lighter, more concerned about privacy, more well integrated to the platform and their other devices (iPhone etc), and is smarter in password management. I don’t even have Google Chrome installed on my Mac.
Chatice ufanista do LinkedIn
A chatice do LinkedIn vem do fato de que as pessoas o usam, majoritariamente, para divulgar grandes conquistas e outros egocentrismos, como se suas empresas fossem perfeitas, quando sabemos que elas operam só para ganhar o máximo de dinheiro que conseguirem, a qualquer custo.
Parece-me que as pessoas são levadas à rede por inveja — “deixa ver o que meu colega fez que eu não fiz” — “deixa eu também mostrar as minhas conquistas maiores ainda”.
A rede seria muito mais útil e interessante se usassem-na para divulgar Ciência (no sentido amplo da palavra) e Conhecimento.
Tudo isso, claro, é só a minha opinião.
Good luck to Kyndryl
To all friends that I’ve worked with at IBM and that are now moving to Kyndryl, I wish you success and good luck. The Cloud and IT services opportunity will continue to be huge forever. The countdown you have promoted here was warm and vibrant.
For the still-on-IBM friends, please keep on doing such a great company that always was and continues to be a brilliant reference to the world, not just IT. IBM is an unforgettable school for me and for anybody else that has spent even just a minute working there.
Business worldwide, as we know it, is shaped by companies such as IBM, even if you’ve never heard about it (well, that’s quite impossible).
Meus Alunos de Dados
Que satisfação ver meus alunos da Digital House ingressando em novas empresas, em cargos de dados.
Como eu vivo dizendo a eles, Dados é uma oportunidade continental, equivalente a descoberta do Novo Mundo em 1492. E é também como sexo de adolescente: todo mundo diz que está fazendo, mas na verdade ninguém, praticamente ninguém mesmo, está fazendo direito.
E é essa geração de profissionais de dados que farão acontecer.
Mãos à obra!

Como Escolher e Comprar um Laptop
Um laptop funcional, poderoso e elegante para a maioria das pessoas custa em torno de $1000. Um MacBook da Apple nessa faixa de preços deve atender bem 95% das pessoas: navegar na Internet, editar documentos, editar fotos/videos/multimídia simples, assistir a filmes/videos, jogos comuns e ter bateria de longa duração. Mas se você quer ir de Windows, prepare-se para atravessar a nado um oceano de ofertas confusas que fabricantes despejam no mercado em seu esforço para se diferenciarem para conquistar clientes, com características que o consumidor poderia dispensar.
Read MoreHow programmers should record time
We the data people immediately identify a poorly designed system when we see it handling date and time as plain local time, instead of the number of seconds since January 1st 1970 of time zone 0.
- This post was published on 1,626,425,523 (UTC, always UTC).
- Jesus was born -62,399,513,432.
- Man visited the moon between -14,552,880 and 93,172,200.
- And so on…
Just your daily dose of nerdy facts…
Die, e-mail, die, die
Nobody here reads e-mails. Avoid sending e-mails. If you need to send an e-mail to someone, notify him/her on Slack in order to actually have them reading it.
First week on a startup.
Die, e-mail, die, die. Finally!
What means to be Driven By Data
I’ve seen companies saying they have Big Data because they implemented Hadoop or a data lake and maybe Spark.
That’s just wrong.
Big Data, or more precisely, to be Data Driven, is a state where the data a company produces can be reused, as soon as possible, to optimize itself. And there are many ways to reuse data: all meetings and decisions happen with abundance of data, or recently generated data instantly feeds machine learning algorithms to optimize transactions, just to name a few situations.
To be Driven by Data is part culture and part infrastructure. On the infrastructure side, IT teams still struggle with limited visions about how data should flow pervasively and how access should be granted. They fear about security and performance while they should fear of missing out the data opportunity.
Data Streaming is a breakthrough recent technology that is here to help with more fluent data access. For an agile and effective data architecture, Data Streaming is much more strategic and important than just a bigger data warehouse because it is the component that can unleash your data and finally make it useful.
What is Apache Spark
Apache Spark is like Python’s Pandas and is like SQL databases. It can manipulate datasets, filter, integrate, transform.
But Spark was designed from scratch with horizontal scalability and parallelism in mind, which makes it capable of handling datasets with billions or even unknown number of rows — even if a bit less flexible than Pandas.
This is not new in the industry. Enterprise editions of commercial SQL databases are parallel and scalable since a very long time, being also very expensive in all levels of the stack: service/support, software and hardware.
But Spark is free software. And can use Hadoop — also a free software — as scalable and highly available storage, on cheap commodity hardware. In addition, it has a vibrant community and a democratic ecosystem of services and support.
As with all Open Source, Apache Spark changes the economic landscape of massive data processing systems market, taking money out of a few proprietary HW and SW vendors and pulverizing it locally on people and support.
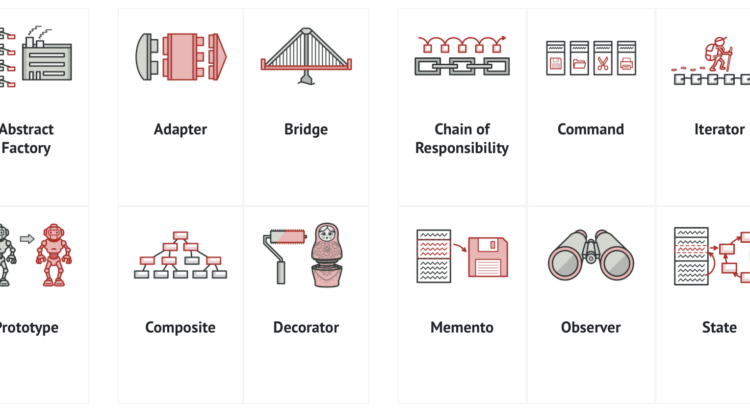
Design Patterns
Programming is the art of creating flexible engines that can be easily extended as new features are needed over time.
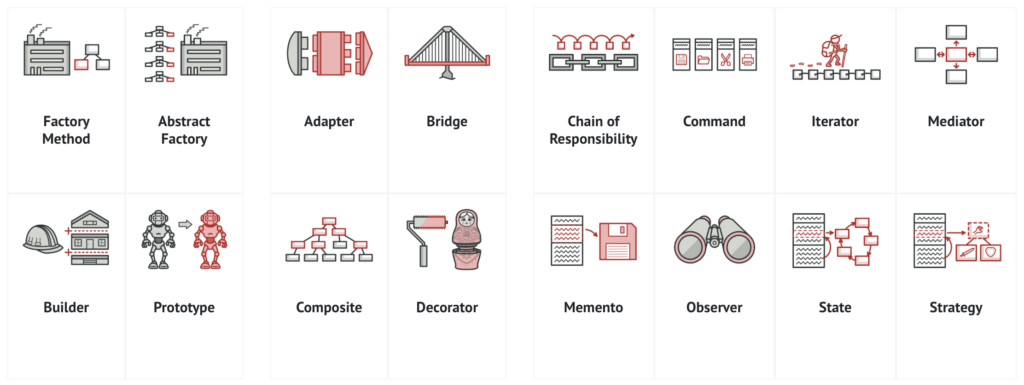
Experienced programmers use Design Patterns to help make engine’s functions, features and structure (materialized as code) easily and clearly extensible.
Young programmers must learn and use Design Patterns, and Refactoring Guru has a very nice starting point.
DecisionDesk prevê que Biden venceu as eleições presidenciais americanas de 2020
A Decision Desk é uma empresa especializada em projeções eleitorais baseadas em estatística e dados. Usaram tendências de eleições passadas para criar modelos matemáticos que só aguardavam um influxo de votos da Pensilvânia para atingir um grau de confiança aceitável. Esse influxo chegou na sexta dia 6 de manhã e confirmou que Biden só aumentará sua vantagem naquele estado daqui prá frente. Projetaram também, as 8:50 da manhã de ontem, que Biden vencerá a contagem nacional com 273 pontos.
Este tipo de uso de dados e algoritmos é o mais próximo que a ciência chegou de “prever o futuro”. Chamamos isso de analítica preditiva. Ainda assim é técnica muito frágil e bem específica pois depende de dados dos mais recentes possível. Porque prever o futuro meeeesmo ninguém consegue.
Mas ainda não acabou. Espera-se que Trump judicialize a coisa toda porque é simplesmente um bad loser lunático. Processo que pode lhe custar muito caro ($$$$) pois terá que fazê-lo em múltiplos estados.
List of Hard Skills for Data Professionals
2020 list of desired hard skills for data professionals. From the most essential to the more difficult ones.
- The English language
- SQL
- Spreadsheets
- Descriptive Statistics (median, variance, correlation etc)
- Notions of Data visualization
- Notions of Time Series
- Handling computer files and folders (this one entered the list because we observed many people simply don’t have it)
- Notions of digital information storage (numbers and their limits, time, time zones, text, Unicode, compression)
- Probability
- Probability Distributions
- Linear and Logistic Regressions
- Python libraries ecosystem, pip, PyPi
- Python’s Pandas, DataFrame and Series wrangling
- Linux and the computer command line
- NoSQL, JSON, YAML, XML, SVG, APIs, HTTP, protocols and data representation
- Cloud and infrastructure as code
- Notions of symmetric and asymmetric cryptography, digital signatures and applications
- “Big data” systems (Hadoop, Spark)
- Software Engineering (classes, modularisation, versioning, containerisation, packaging, DevOps)
- Inferential Statistics (confidence intervals, hypothesis testing)
- Machine Learning algorithms for regression and classification
- Calculus and Numerical Calculus (integrals, derivaties)
- Natural Language Processing
- Computer vision
- Neural Networks
Please remember this list has only hard skills. Ethics, domain and industry knowledge, communication are very important soft skills that won’t fit in this list.
Generally speaking, beginning of the list is where Data Analysts are (up to ≈11). Data Engineers get up to the middle of list (up to ≈18). And Scientists get all the list.
There is also the following graph that I’ve produced:


Leitor de dedo não
Podemos agradecer ao virus corona por ajudar a erradicar os leitores de dedo para uso banal como catraca de academias, recepções de prédios comerciais e residenciais etc. Eu nunca relei meus dedos nesses leitores e você deveria fazer o mesmo, pois da perspectiva de Segurança da Informação aquilo é um engodo. E da perspectiva de Higiene, é nojento.
Leitores de dedo são uma “maravilha” para armazenar e socializar germes, bem como sucos vitais que todos nós expelimos (suor e todo tipo de meleca). Se você está envolvido em projetos que implantam esse tipo de tecnologia, prefira outras biometrias superiores que já estão em todo lugar, como reconhecimento facial de múltiplas câmeras.
Este post tem a objetiva intenção de te dar asco de leitores de dedo.
Jupyter and Data Science on a Mac (without Anaconda)
macOS Catalina doesn’t ship with Python 3, only 2. But you can still get 3 from Apple, updated regularly through system’s official update methods. You don’t need to get the awful Anaconda on you Mac to play with Python.
Python 3 is shipped by Xcode Command Line Tools. To get it installed (without the heavy Xcode GUI), type this in your terminal:
xcode-select --install
This way, every time Apple releases an update, you’ll get it.
Settings window will pop so wait 5 minutes for the installation to finish.
If you already have complete Xcode installed, this step was unnecessary (you already had Python 3 installed) and you can continue to the next section of the tutorial.
Clean Old Python Modules
In case you already have Python installed under your user and modules downloaded with pip, remove it:
rm -rf ${HOME}/Caches/com.apple.python/${HOME}/Library/Python \
${HOME}/Library/Python/ \
${HOME}/Library/Caches/pip
Install Python Modules
Now that you get a useful Python 3 installation, use pip3 to install Python modules that you’ll need. Don’t forget to use –user to get things installed on your home folder so you won’t pollute your overall system. For my personal use, I need the complete machine learning, data wrangling and Jupyter suite:
pip3 install --user sqlalchemy
pip3 install --user matplotlib
pip3 install --user pandas
pip3 install --user jupyterlab
pip3 install --user PyMySQL
pip3 install --user configobj
pip3 install --user requests
pip3 install --user seaborn
pip3 install --user bs4
pip3 install --user xgboost
pip3 install --user scikit_learn
But you might need other things as Django or other sqlalchemy drivers. Set yourself at home and install them with pip3.
For modules that require compilation and special library, say crypto, do it like this:
CFLAGS="-I/Library/Developer/CommandLineTools/Library/Frameworks/Python3.framework/Versions/3.7/include" \
LDFLAGS="-L/Library/Developer/CommandLineTools/Library/Frameworks/Python3.framework/Versions/3.7/lib" \
pip3 install --user pycrypto
Use Correct Python 3 Binary
For some reason, Apple installs many different Python 3 binaries in different places of the system. The one that gets installed on /usr/bin/python3 has problems loading some libraries and instrumentation with install_name_tool would be required. So lets just use the binary that works better:
export PATH=/Library/Developer/CommandLineTools/usr/bin:$PATH
Run Jupyter Lab on your Mac
Commands installed by pip3 will be available in the ~/Library/Python/3.7/bin/ folder, so just add it to your PATH:
export PATH=$PATH:~/Library/Python/3.7/bin/
Now I can simply type jupyter-lab anywhere in the terminal or command line to make it fire my browser and get a Jupyter environment.
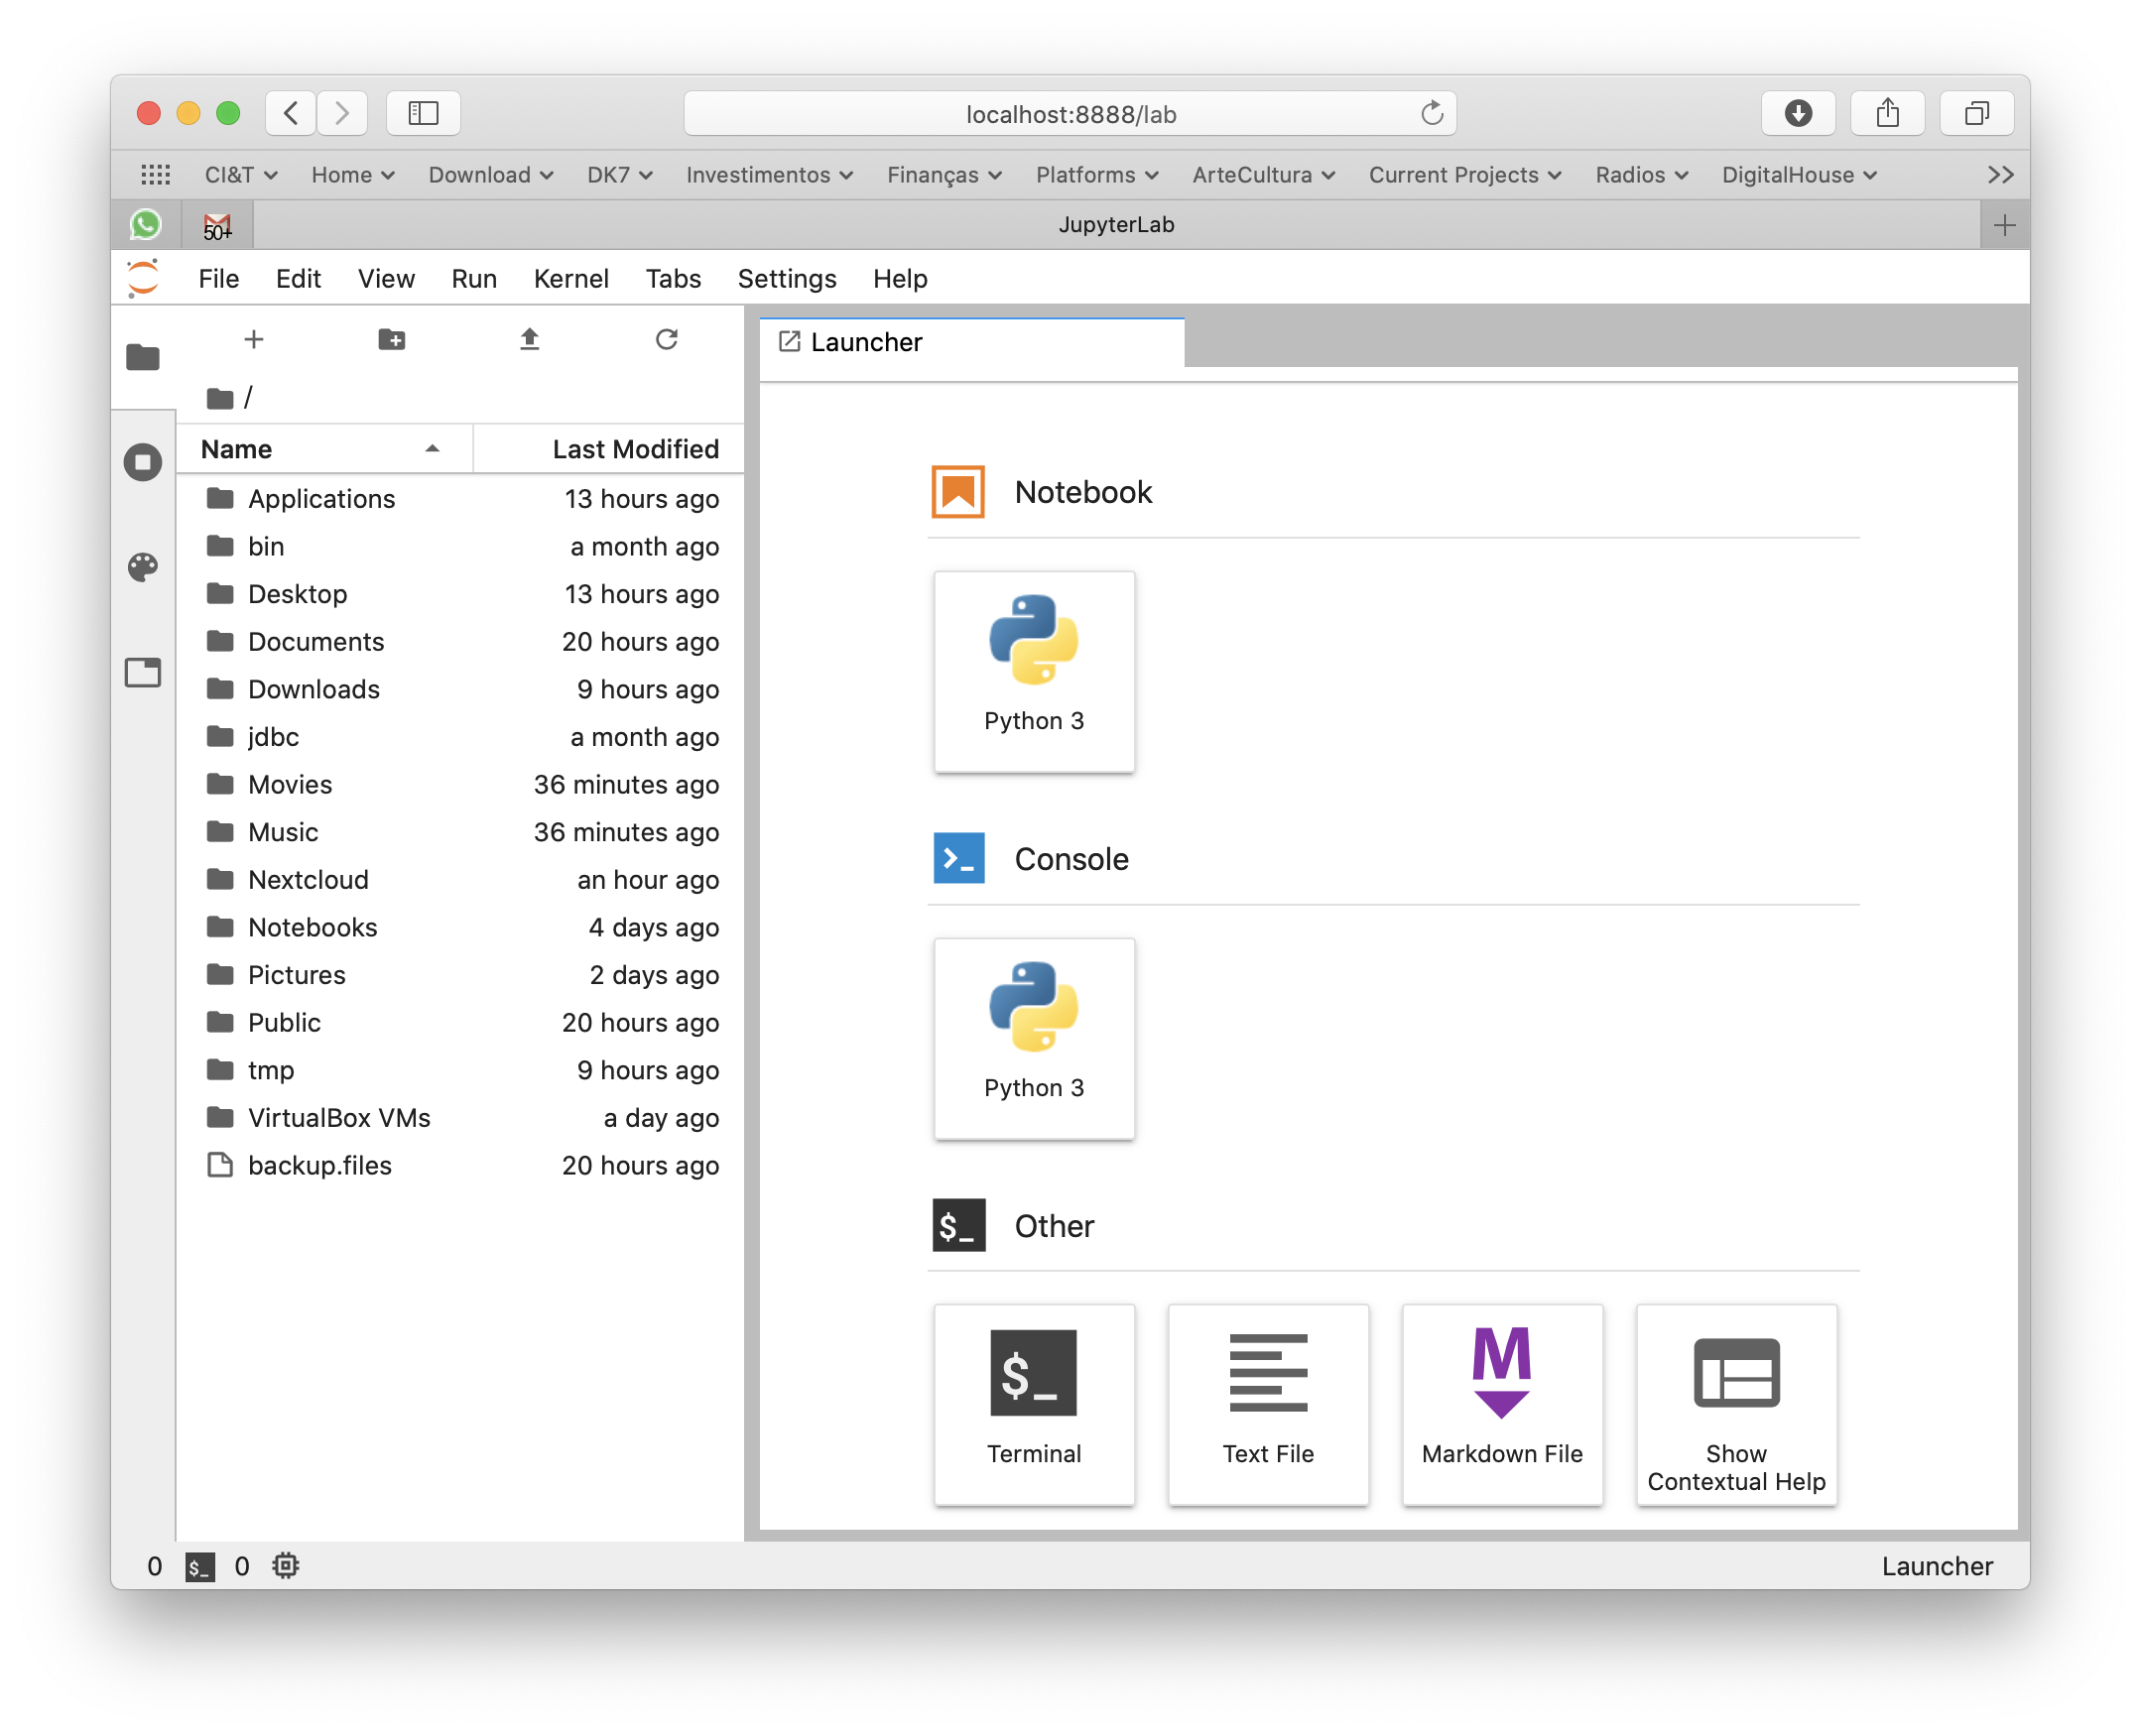
More about Xcode Command Line Tools
Xcode Command Line Tools will get you a full hand of other useful developer tools, such as git, subversion, GCC and LLVM compilers and linkers, make, m4 and a complete Python 3 distribution. You can see most of its installation on /Library/Developer/CommandLineTools folder.
For production and high end processing I’ll still use Python on Linux with my preferred distribution’s default packages (no Anaconda). But this method of getting Python on macOS is fastest and cleanest to get you going on your own data scientist laptop without a VM nor a container.

A emergência de BIs Open Source
Se sua missão é entregar dados a usuários, soluções de Business Intelligence open source baseadas em Python emergem como opções muito atrativas frente aos proprietários MicroStrategy, PowerBI, Cognos, Google Data Studio, Tableau etc.
Read More
Oráculos do século XXI: O Papel do Cientista de Dados
A profissão de Cientista de Dados ganhou notoriedade e eminência nos últimos anos. Uma figura que tem saído do círculo hipster das startups e invadindo empresas de todos os tamanhos. Até os mais tradicionais executivos já compreendem que, tendo seu negócio entrando na era da informação e se tornado uma usina de dados, há que se lançar mão de profissionais especializados, que saibam como tirar proveito de todos esses dados.
Mas será que está claramente compreendido qual é o papel do Cientista de Dados? Sabe-se o que esperar dele? Consegue-se usufruir de todo o seu potencial?
Enquanto os outros profissionais da área de dados, se aproximam ou mais do TI (como o engenheiro de dados) ou mais do negócio (como o analista de dados), o Cientista trabalha o tempo todo junto às duas áreas.
Enquanto os outros profissionais de dados tratam da curadoria, performance, qualidade, apresentação de informações que existem, o foco principal do Cientista de Dados é calcular tendências e inferir dados que ainda não existem.
Os Dados que Não Existem e seu Valor para o Negócio
O Cientista de Dados está próximo do negócio. Entende sua semântica, desafios e necessidades. E tem plena consciência das informações que tem a sua disposição, sejam privadas ou públicas. E quais novas informações pode derivar delas. Navegar nesses dois mundos — dados e negócios — permite ao Cientista de Dados fazer melhores perguntas e já trazer respostas sobre o negócio — respostas que são os dados que ainda não existem. Por exemplo:
- Quem são os clientes que têm mais tendência para comprar produto A ou B ?
- Quais estudantes têm propensão para abandonar o curso? Para cada um deles, quais os fatores que mais influenciam o abandono ?
- Quais clientes têm propensão para cancelar contratos e por que? Para evitar, devo dar desconto, mudar o atendimento ou resolver certo problema ?
- Quais características físico-químicas (densidade, cor, concentração de álcool) de um determinado vinho influenciaram positivamente sua nota? Quais características influenciaram negativamente ?
- Quais característica fisiológicas de um bebê prematuro estão relacionadas a doenças que se desenvolvem mais tarde em sua vida ?
- Quais imóveis estão super-valorizados? E quais têm preço muito bom e representam uma oportunidade ?
- Como salvar proativamente o paciente de um infarto ?
- No meu conjunto de processos judiciais, quais tenho mais propensão de ganhar? E de perder ?
- Qual é o melhor equilíbrio entre risco e oportunidade ?
- Qual equipamento vai falhar e quando ?
- Quem está me fraudando e quais são os padrões comportamentais de fraudadores ?
- Quando terei um pico incomum de chamados no meu call center ?
- Quais grupos de clientes tenho? Como agrupá-los por características ocultas comuns ?
Repare que muitas dessas perguntas estão relacionadas ao futuro, a informações que não existem ainda. Cientistas de Dados conseguem prever o futuro — ou a probabilidades de eventos acontecerem — e é por isso que são verdadeiros oráculos.
Essa capacidade do Cientista de Dados também coloca-o na posição de literalmente poder calcular a chance de sucesso de uma determinada iniciativa de negócio.
O Cientista de Dados no Mapa da TI Corporativa
Em 2013, Gartner explicou ao mundo o nexo das novas forças de TI, onde Dados, Mobilidade e Redes Sociais têm um papel determinante para o sucesso de qualquer empresa que quer se manter moderna.

Fica claro que a Mobilidade é a rota para uma organização chegar nas pessoas, sejam elas clientes ou colaboradores. Alavancar também o poder colaborativo das Redes Sociais para fomentar uso e fazer os Dados circularem. No começo dessa era, houve uma corrida para empresas criarem suas apps, que nada mais eram do que o catálogo digital de seus produtos, ou seu site institucional no smartphone, ou até mesmo prover diretamente os dados a seus usuários, como seu saldo ou extrato. Pouca novidade até aqui. Mas a era da Mobilidade representa o momento histórico em que organizações passam a estar constantemente ao lado de seus clientes e colaboradores, quando acordam, quando trabalham, quando almoçam, quando vão dormir. Mais ainda: se o usuário der permissão para a app, ela poderá chamá-lo para interagir ou entregar uma novidade, através das notificações que aparecem na tela.
Mas qual informação a app vai entregar proativamente ao usuário? Quando? Onde? É o Cientista de Dados que tem a responsabilidade de fazer a ponte entre os dados virgens e a app do usuário, no sentido de entregar a informação certa na hora e no lugar adequado, com o objetivo de tocar o coração de quem usa.
As possibilidades são infinitas. Um exemplo no varejo é determinar quais são os clientes que devem receber uma notificação às 11:45 da manhã informando que já está disponível na loja nas redondezas onde ele costuma almoçar um produto que vai lhes interessar.
Um outro campo interessantíssimo para o Cientista de Dados é próximo ao fenômeno da Internet das Coisas, onde sensores coletam constantemente dados do ambiente a sua volta. Inclui-se aqui também sensores biométricos, que medem indicadores do corpo humano, como características do sono, pressão sangüínea, alimentação etc. O Cientista de Dados é a figura que agrega esses dados — que isoladamente têm baixa significância — encontra correlações pouco óbvias e é capaz de re-injetá-los no processo do negócio para assim transformá-lo, otimizando ações que outrora eram reativas, em proativas.
A Caixa de Ferramentas do Cientista de Dados
Dizem que o Cientista de Dados é um estatístico que conhece mais ferramentas computacionais que um estatístico médio. Ou também um programador que conhece mais estatística que um programador médio.
Base sólida em matemática, probabilidade e pensamento estatístico, boas noções de econometria, bons conhecimentos em ferramentas computacionais como machine learning, fazem um Cientista de Dados ser prático e mão-na-massa. Multidisciplinaridade e traquejo para circular nos corredores do negócio são extremamente importantes também. Apesar de seu pé na programação, o estereótipo engraçado do programador que vive a base de pizza e cafeina não combina muito bem com o Cientista de Dados.
Claro, há bons profissionais que não programam ou deixaram de ser mão-na-massa. Estes acabam atuando coma uma espécie de CDO (chief digital officer), com o adicional de que têm experiências mais concretas sobre onde pode-se chegar com os dados. Mesmo assim, ele terá que lançar mão de outros Cientistas de Dados que programam e são mais mão-na-massa.
O Cientista de Dados geralmente programa em Python, usa Jupyter e é bom conhecedor do ferramental de visualização e gráficos dessa linguagem, bem como as de machine learning e inferência estatística. SciKit Learn, StatsModel, Pandas, Seaborn, XGBoost, Shapley é o arroz-com-feijão deste profissional.

Jornada para a Ciência de Dados
Respire fundo e arregace as mangas caso escolha ser um Cientista de Dados. A gama de disciplinas exigidas é larga. Vai de matemática, programação, TI, até o negócio, cultura e intuição sobre o mundo a sua volta. Prepare-se para programar com ferramentas avançadas e que sempre estarão em voga. Prepare-se para conhecer o negócio em nível matemático e também multicultural e multidisciplinar.
Mas chegando lá, você será singular em sua roda. Terá uma posição sob os holofotes em seu meio profissional, devido a sua bagagem de conhecimentos e capacidade de transformação.
Para se apreciar uma bela vista, é necessário escalar uma alta montanha. E o Cientista de Dados é o que está em seu topo.
Como o WhatsApp foi usado para disseminar fake news e como combater
Ao contrário do que se pensa, os robôs da campanha via WhatsApp não enviaram as fake news diretamente para milhões de brasileiros. Enviavam só para algumas centenas de grupos extremistas enormes como “Direita é o Poder”, “Parada Hétero” etc. A partir daí, seus usuários humanos propagavam organicamente os memes e fakes pelos seus grupos de família, escola e trabalho, que por sua vez também os propagavam. E foi assim que a maioria dos brasileiros receberam de seus próprios amigos (e não de robôs) a enxurrada de memes que vimos ao longo de setembro.
Todas as campanhas políticas da história lançaram mão de disseminação de boatos, propaganda enganosa, disseminação de medo, incerteza e dúvida. Essas construções da mente são, inclusive, uma das característica que nos diferenciam dos outros animais, conforme citam Yuval Harari em seu livro Sapiens e outros autores.
Mas na campanha presidencial brasileira de 2018 isso foi levado a níveis extremamente nocivos devido a junção inédita de 3 fatores:
- Conteúdos mais acessíveis, em forma de memes, imagens, charges, videos e também artigos. As mensagens são sutis e enviesadas, nem sempre são noticias falsas, às vezes são só piadas de mau gosto. Mas o objetivo é claro e sempre o mesmo: destilar escárnio, ódio e preconceito. Seus mensageiros, quando questionados quanto a ofensa contida na mensagem, frequentemente responderão que ela contém “a mais pura verdade”. O meme é facilmente produzido pelos próprios usuários em seus celulares ou por agências profissionais contratadas. O importante é capturar imediatamente a atenção de quem recebe o conteúdo. Veja alguns exemplos neste artigo do El Pais.
- Disseminação em massa do conteúdo por robôs, em grandes grupos de WhatsApp de muito interesse naquela mensagem. Trata-se de grandes grupos de WhatsApp onde a maioria dos participantes não se conhecem pessoalmente, nunca saberão se um dos números de telefone alí é um robô de disparo de mensagens. Quando o conteúdo é inserido pelo robô, a posição política coletiva do grupo entra rapidamente em sintonia com ele, e sua pitada de humor o livra de maiores questionamentos sobre sua veracidade. Um usuário mais questionador rapidamente perderia força num embate com o grupo extremista porque o massacrariam com “deixa disso”s. Depois da inserção intencional do conteúdo, começa a 2ª fase: os próprios usuários, felizes com um novo conteúdo divertido e importante, divulgam-no organicamente para seus outros grupos restritos e fechados que são da família, da escola, do trabalho e assim ele continua se propagando organicamente. A enorme maioria das pessoas acaba recebendo o conteúdo nessa segunda fase, de forma orgânica. Essa 2ª fase orgânica esconde a origem robótica e artificial da 1ª fase. A seleção inicial desses grandes grupos de WhatsApp, que têm afinidade com a mensagem que se quer transmitir, e a adição dos robôs neles, é a parte mais estratégica da campanha porque é o mecanismo para se plantar a semente. Os robôs enviam os memes somente para os grupos de interesse, nunca diretamente para pessoas avulsas, como alguns pensam.
- Mobilidade pervasiva. Este fator obviamente habilitou os dois anteriores. É o celular que nos chama o tempo todo e que só saberemos se é uma emergência médica de um parente ou uma bobagem qualquer depois de dar uma olhadinha.
Foi no começo de setembro que observei um aumento expressivo na disseminação de memes nos grupos da escola e da família que faço parte. É difícil saber se é puramente orgânico ou se foi estimulado por uma campanha de robôs alguns níveis antes. No meu caso, o conteúdo era encaminhado sempre por 3 usuários, um deles declaradamente de extrema direita e muito ativo politicamente.
O video da denuncia, que mostra o próprio Bolsonaro e a tela do WhatsApp em atualização frenética devido ao envio robótico de mensagens (que emergiu em 2 de outubro de 2018), revela os grupos de muito interesse através de seus nomes: “Direita é o Poder”, “Direita Ativa”, “Direita Agreste”, “BolsoMito”, “Direita Aprendiz”, “Parada Hétero” etc. Essa lista específica de grupos, aquela alta velocidade anormal de recebimento de mensagens, nas mãos de Bolsonaro, para mim comprovam o uso consciente de robôs de envio de mensagens de campanha. Todos os brasileiros puderam observar a eficácia dessa campanha visto a enxurrada de memes de ódio e escárnio que recebemos em nossos celulares. Muitos infelizmente foram permeáveis a esse ódio constante e insistentemente comunicado.
Como levantar provas sobre o conteúdo inserido no WhatsApp, ainda para as eleições de 2018
O aplicativo registra quando uma mensagem é encaminhada, pode-se ver o “Forward” ou “Encaminhado” sobre o balão da mensagem. Por trás dos panos, o aplicativo guarda uma série de metadados sobre a mensagem que numa análise forense nos servidores do WhatsApp permitiriam recriar toda a trajetória da mensagem, mesmo que o conteúdo em si é criptografado na transmissão entre usuários. Em outras palavras, via mandado judicial ou outro pedido formal, o WhatsApp seria capaz de dar um relatório completo sobre o conteúdo, incluindo quando o meme foi inicialmente publicado na rede, de qual endereço de internet, se foi usado um computador ou celular, de qual marca, de que região do planeta, número de telefone do usuário e eventualmente até seu usuário Facebook.
Como combater esse mal de forma mais definitiva no futuro
Qualquer tipo de limitação ou restrição não é a solução de longo prazo, mesmo porque o aplicativo não sabe diferenciar entre receitas de bolo e memes de ódio. Criar restrições para um tipo, valerão desnecessariamente para o outro tipo de conteúdo.
O que falta no WhatsApp é um mecanismo para que usuários denunciem conteúdo impróprio, colocando-o numa espécie de quarentena e assim evitar que outros usuários, inclusive em outros grupos façam qualquer coisa com tal conteúdo problemático. No Facebook, funcionalidade similar já foi implementada após os problemas nas eleições do Trump. Uma proposta para o WhatsApp seria o usuário selecionar o conteúdo ofensivo e denunciá-lo via alguma opção inédita no aplicativo. Uma vez decidido que é ofensivo/falso, o conteúdo passaria a ter uma moldura vermelha ou outra marca visual clara aos usuários informando que ele é problemático. O aplicativo inibiria e bloquearia outras operações sobre esse conteúdo também, como encaminhamentos, salvar no rolo da câmera etc.
Mas tudo isso, só para as próximas eleições.

Playing with HEIC images in lossless mode
One of the most interesting features of the new HEIF/HEIC image format — and a true expected innovation — is lossless compression.
Read More
